
A little while ago, I wrote a blog on how to dynamically save a file with different file paths based on a folder structure that has a separate folder for each year/month. I’ve since used variations on this trick a few different ways, so instead of writing multiple blogs, I figured I’d condense them into one blog with three use cases.
Example 1: updating folder locations based on dates
I’ve already written about this one, so I’ll only briefly recap it here. What happens when you’ve got a network drive with a folder structure like this? You’d have to update your output tools every time the month changes, right?

Nope. You can use a single formula tool with multiple calculations to generate the file path based on the date that you’re running the workflow, like this:

…and then use that file path in your output tool to automatically update the folder location you’re saving to depending on when you’re running the workflow:

The only caveat here is that it won’t create the folder if it doesn’t already exist – I had this recently when I was up super early on April 1st and got an error because the \2021\Apr folder wasn’t there. Not a huge problem since my workflow only took a couple of minutes to run – I just created the folder myself and then re-ran it – but it could be really annoying if you’ve got a big chunky workflow and it errors out after an hour of runtime for something so trivial.
Example 2: different files for different people
The second example is when you want to create different files for different people/users/customers/whatever.
I work at Asda, and so a lot of our data and reporting is store-specific. The store manager at Asda on Old Kent Road in London really doesn’t care about what’s going on at the Asda on Kirkstall Road in Leeds, and vice versa – they just want to have their own data. But with hundreds of stores across the UK, I don’t want to have a separate workflow for each store. I don’t even want to have one workflow with hundreds of separate output tools for each store.
Luckily, I can use the same trick to automatically create a different file for each store by generating a different file name and saving them all within one output tool. Let’s say I’ve got a data set like this:
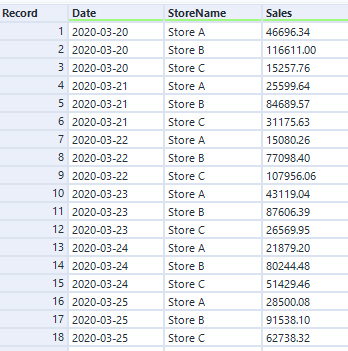
I can use the store name in the StoreName field to create a separate file name, simply by adding it in a file path. In this example, it’ll make a file called “Sales for Store A.csv”, and save it in the folder location specified in the formula tool:

I set up my output tool in exactly the same way as example – change the entire file path, take the name from the field I’ve created called FilePath, and don’t keep that field in the output:

After running that, I get three files:
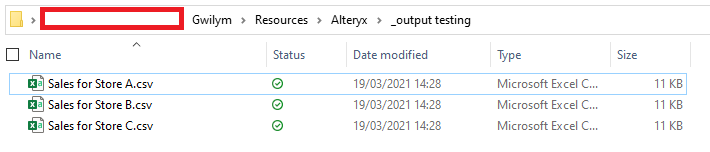
And when I open the Sales for Store A.csv file in Excel, I can see that it’s only got Store A’s data in it:

Example 3: splitting up a big CSV / SQL statement
My third example is splitting up a big data set into chunks so that other people can use it without specialist data tools.
In my specific case, I’m using Alteryx to pull data from several data sources together, do some stuff with it, and generate the SQL upload syntax for the database admin to load it into the main database. We could technically do this straight from Alteryx, but a) this is an occasional ad-hoc thing rather than something to productionise and schedule, and b) I don’t have write-admin rights to the main database, a responsibility that I’m perfectly happy to avoid.
Anyway, what often happens is that I’ve got a few million lines for the admin to upload. I can generate a text file or a .sql file with all those lines, and the admin can run that with a script… but it would take forever to open if the admin wants to take a look at the contents before just running whatever I’ve sent them into a database. So, I want to split it up into manageable chunks that they can easily open in Excel or a text editor or whatever else. This is also useful when sending people data in general, not just SQL statements, when you know they’re going to be using Excel to look at it.
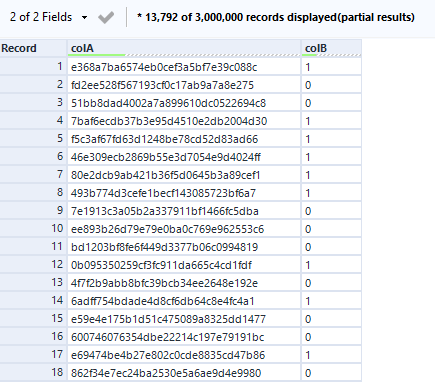
Let’s take some more fake data, this time with 3m rows:
The overall process is to add a record ID, do a nice little floor calc, deselect the record ID, and write it out in files like “data 1.csv”, “data 2.csv”, “data 3.csv”, etc.:

After putting the record ID on, I want to create an output number for each file. The first thing to do is decide how many rows I want in each file. In this example, I’ve gone for 100,000 rows per file. In two steps, I create the output number, then use that to create the file path in the same way we’ve seen in the first two examples:
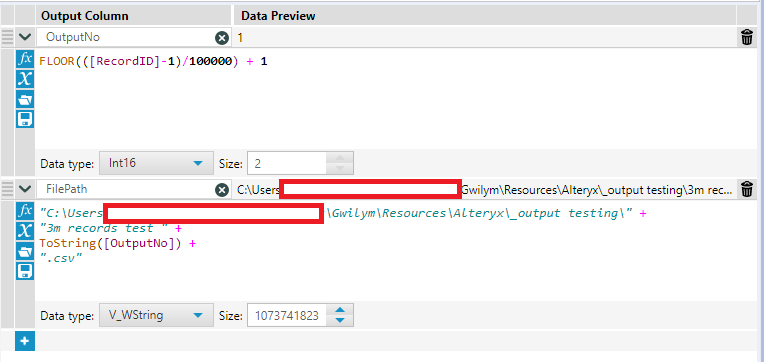
Here’s the floor calc in text so you can simply copy/paste it:
FLOOR(([RecordID]-1)/100000) + 1How does it work?
The floor function rounds down a number with decimal places to the whole number preceding the decimal point. If you imagine a number with decimal places as a string, it’s like simply deleting the decimal point and all the numbers after that. A number like 3.77 would become 3, for example.
In this calc, it uses the record ID, and subtracts 1 so that the record ID goes from 0 to 2,999,999. It then divides that record ID by 100,000 (or however many rows you want in your file). For the 100,000 records from 0 through to 99,999, the division returns a number between 0 and 0.99999. When you floor this, you get 0 for those 100,000 records. For the 100,000 from 100,000 through to 199,999, the division returns a number between 1 and 1.99999. When you floor this, you get 1 for those 100,000 records… and so on. After that, I just add 1 again so that my floored numbers start at 1 instead of 0.
(yes, you could just set the RecordID tool to start from 0 instead of 1 and just take the FLOOR(RecordID/100000) + 1… but I always forget about that, so I find it easier to copy across this formula instead)
Then we set up the output in the same way:
…and we’ve got 30 .csv files with 100,000 rows each:

Also, if you need to write out a large amount of data which you also need to split into multiple files to make it work for whatever you’re using it for afterwards, honestly, you probably want to address that first. I’m aware that it’s not a great process I’ve got going on here! But it’s a quick fix for a quick thing that I’ve found really useful when getting something off the ground, and it’s something I’d change if this ever turns into a scheduled process.
